Showing posts with label Glue Dots. Show all posts

Friday, April 13, 2012

Getting Crafty with Glue Dots!

Hi everyone! It's so nice to start getting back into my routine. Life spiraled out of control for a month but things are finally settling down a bit, not all the way, but its getting better. I saw the back specialist today and I will be getting another set of Steroid Epidural shots in my back so I can function again. I went to the ER a couple of weeks ago in the ambulance because of my back and I was home alone but all is well now and we are working on finding the solution to the pain because the problem is not really fixable. But the last time I had the shot it helped me tremendously so I am so ready for another one. 

Also I will be gone next weekend for a few days on a secret trip to meet up with a company for some exciting crafty stuff coming up for me! I cant wait to share!! (: LOTS MORE great and exciting things happening soon!!

Today I would like to share with you my projects from March for Glue Dots. I didn't get a chance to share with you after my Dad had the heart attack. I have been spending time with him and family. Plus the issues with me. And also my daughter having some breathing issues. But we are doing much better and getting things fixed. But prayers would be MUCH appreciated :)

My first project I would have LOVED to share with you last month since its an EASTER project but I still just have to share with you.


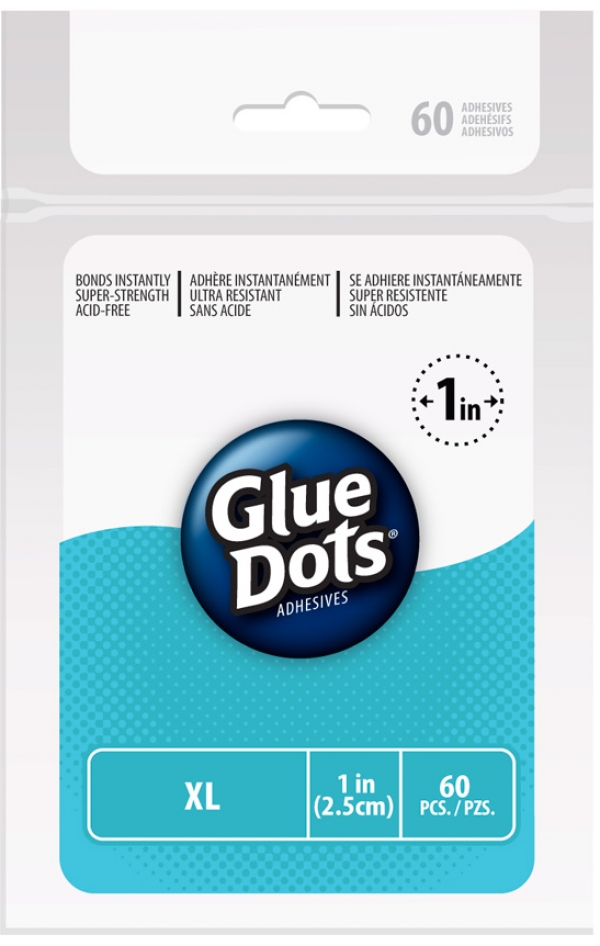
I just LOVE LOVE LOVE how this card turned out!!! The colors are just my favorite!! I used lots of GLUE DOTS on this project: Pop Up Glue Dots and Craft Glue Dots. They come in so handy for me, I love the dots on the rolls. The stamp set is illustrated by ME :) for The Crafts Meow - its called "Owl See You in the Spring". This super cute paper is by Doodlebug Designs called "Hello Spring". I just love Doodlebug papers. The owl in the egg is colored with Copic markers. And the Hexagons are cut with Lifestyle Crafts dies.

Card Instructions:
1. Make card from cardstock, 4.25" x 5.5".
2. Die cut hexagon shapes with patterned paper of your choosing.
3. Adhere shapes with Glue Dots Pop Up dots and Craft dots.
4. Color and cut out owl bunny and egg. Adhere with Pop Up Dots.
5. Use gel pen and highlight around shapes.
6. Stamp sentiment and enjoy!

Supplies used:
Doodlebug Designs 6x6 Hello Spring paper
Copics
The Crafts Meow Owl See You in the Spring stamps
Uniball Signo white pen


My next project I did tonight so I could share a card thats not a holiday thats past already. And I just love how it came out with this cute washi tape.


I used some Washi Tape from Target for the background. LOVE the washi tape they are carrying now in the stationary section. Its SO cute! 

Card Instructions:
1. Make card from cardstock. 4.5"x 5.5"
2. Adhere washi tape along card.
3. Stamp umbrella onto washi tape with Stazon. Cut out and adhere with Glue Dots Pop Up dots.
4. Stamp owl and color with Copics. Cut out and adhere with Glue Dots Mini dots.
5. Stamp sentiment and clouds, cut out and adhere to card.
6.  Enjoy! (:

Supplies:

Washi Tape from Target
The Crafts Meow "Spring is Here" stamps
Cardstock from Papertrey Ink
Copics
Lifestyle Crafts hexagon dies

Thanks for stopping in for a visit! I hope you enjoyed todays projects! Maybe now my mojo will start coming back. I have also been working on some word art and stamp ideas. IF YOU WOULD LIKE TO SEE PICTURES THAT I POST, JOIN ME ON INSTAGRAM. MY NAME ON THERE IS WEEMEMORIES.  Hope to see you on there. I LOVE Instagram! One of my favorite apps!

For more of my Glue Dots projects, be sure to check out the gallery on the Glue Dots website HERE for LOTS of ideas and to see all the products they carry.

I hope you all have a GREAT weekend!
Many blessings to you!!!
And thank you in advance for your prayers!!!

(: (: Jenny S.

Wednesday, March 7, 2012

Some Glue, Some Green and a Giveaway in Between!

Happy day friends! Hope your week is going great.

Sorry I have been quiet the past couple weeks, it is tax time for me and I am super swamped. I worked till 10 pm on Monday and its been late days for me all month. But now that I am caught up, I can get back to crafting. 

I also was sick from last Thursday till yesterday, im glad to be feeling much better but then today I found out my ex-husbands Dad passed away. We may be divorced but I did care allot about his family. It was hard to take in, I knew him for 20 years and he was a great man.

......

I am here to share a fun St. Patricks Day project using my favorite glue, GLUE DOTS.
Is your go-to glue Glue Dots too?

On my card I used my new stamp designs for The Crafts Meow. Have you seen them? This set is called Owl See You in the Spring. Its sold out right now but more are on the way. So excited that everyone loves it.


On this card I used my favorite Glue Dots: 


Pop Ups: Used these to give dimension to my project.


Micro dots: Used these for small items.

For the rest of my card I used Owl See You in the Spring and Just Saying from The Crafts Meow. I stamped the background stamp with Jenni Bowlin Seed Packet ink. I colored the owl with Copics.

AND Glue Dots has given me some product to give away!!
Want to win some Glue Dots?

I will be giving away to one lucky winner:
Glue Dots XXL Dots
Glue Dots XL Dots
Glue Dots Craft Roll Dots

To be entered to win this great prize all you have to do is:
1. Leave a comment on this post letting me know your favorite Glue Dots product.
2. Follow my blog and leave a note in your comment that you are (you must be a follower to win)

Thats all! (:
I will draw a winner on Saturday, March 10. You have till Friday, March 9 at 11:59pm to comment to win.

.....

And a little note: I know a few of you are waiting for packages from me, I promise I will be getting those out this week. I am trying hard to turn my to do list into a ta-done list. I am way behind on my mailings but I am working hard to get caught up so bare with me. Thanks.

Hope you all have a great week. 
:) :) :) Jenny

Monday, February 13, 2012

Glue Dots Altered Art Projects and NEW Dots!

Hi everyone! (: Today I am sharing a couple of projects using some new Glue Dots products. They are so handy and I am so glad they came out with these.

Tissue Paper Flowers project:


For this Flower frame I used the 2" XXL Glue Dots. The background stamp is from Hero Arts Newpaper background and the twine is from The Twinery.


Project Instructions:
- Cut white cardstock to desired size for your frame.
- Stamp background with your choice of ink.
- Mist with Tattered Angels Snowflake mist.
- Adhere twine stem and leaves with Micro Glue Dots.
- Stamp sentiment on background.
- Cut a piece of tissue paper about 1ft long and fold in half.


- Scrunch


- Using the 2" XXL Glue Dot roll the folded tissue paper in a circle around the dot while folding it until you cover the whole dot.


-Adhere to your background.
- You can spritz your flowers with mist like I did to give them shine.
- Adhere a button to the center if desired.


.........


Wool Felt Flowers project:


For this project I used the 1" XL Glue Dots. The background stamp is the same I used for the project above, the felt is from Papertrey Ink, twine is from The Twinery, flower die and cloud die is from My Favorite Things and the sentiment is from Paper Smooches.


Project Instructions:
- Cut white cardstock to the shape for your frame and stamp with the background stamp.
- I spritzed the background with Studio Calico Mister Huey misters.
- Cut your choice of colored felt or you can use cardstock and die cut flowers and cloud.
- Adhere twine stem and leaves with Micro Glue Dots.
- Roll your flower until you get your desired look then adhere with the 1" XL Glue Dots.
-Adhere flowers to background. 
- Stamp sentiment to bg.
Enjoy! (:

Close up:


Thanks for visiting and I hope you enjoyed the projects I shared with you today. If you decide to do one, be sure to share your link!

Hope you all have a very special and HAPPY VALENTINES DAY!! (: (: (:


Jenny Suchin

Tuesday, January 3, 2012

Happy Owlentines Day

Hi everyone! :)

It's so nice to be posting again!!
Today I want to share with you some projects using my favorite adhesive, Glue Dots!
Our projects for December are to share some Valentines Day/Wedding projects. I choose some Valentines Day cards!


Aren't they cute? 
This stamp is from my new set HAPPY OWLENTINES DAY over at The Craft's Meow!

On my cards I used Glue Dots craft roll to adhere the owls and Glue Dots pop up roll for the balloon and envelope to give them added dimension. You can see all the adhesives Glue Dots carries HERE.

I hope you like these cards im sharing with you today. If you want complete instructions, visit the Glue Dots website and look under Crafts for my project!

.....

I would also like to share another card I did while I was working on my set of cards.


This is my FAVORITE of all the stamps in my new HAPPY OWLENTINES DAY set over at The Craft's Meow!

Thanks for visiting and I will be back soon with more projects to share!
Be sure to check the post 2 posts below this one for my giveaway.

Have a great week! :) :) :)


Jenny Suchin

Monday, November 21, 2011

Fun Christmas projects!

Good morning everyone! :) Hope you had a wonderful weekend.
I dont know about you but I am ready for next week! Im so glad to have a 5 day weekend. I look forward to the time with my family and the days off.

Today I would like to share some Christmas projects I did using my Glue Dots. Im sure all of you have heard about Glue Dots and use them on your projects. They have a wide variety of glues to fit every need. And today I will be sharing projects using Glue Dots.

My first project is my Christmas owl house.


For this project I used some Glue Dots Rolls - On this I used Mini, Craft, Ultra-Thin, and Micro Glue Dots. You can get them for your projects HERE.


To make the owl house, here is the instructions:
1. Pick your acrylic paint colors and paint your owl house. Let dry.
2. Use some glitter snow and glue to bottom and roof of the owl house.
3. Get the stamps you would like to use, color and fussy cut them out.
4. For the sign, use some twine to hang the sign from the house.
5. Adhere stamp images to house using your Glue Dots.
6. Use a pin and push into roof, use a glue dot to adhere image to pin.
7. Display your beautiful house! Enjoy!

And here is the list of what you need to make this:
GLUE DOTS Rolls: Mini, Craft, Ultra-Thin, and Micro
Wood Birdhouse (I got mine at Michaels)
Acrylic Paints in assorted colors
Foam Paintbrush
Stamps - Mine are from The Craft's Meow (illustrated by me)
Stickles
Pins
Copic Markers (or any of your choice)
Twine

......

My next project are these Patterned Paper Christmas Trees:


To make these, here are the instructions:
1. Using the tree template HERE, cut out your trees from patterned paper.
2. Glue the sides together and shape into a tree using Glue Dots 1" Glue Lines.
3. Using the same template above for the bottoms, cut out and adhere bottoms using Glue Dots Craft Roll.
4. To make the tree toppers, using twine you can make these pompoms. Instructions for those are HERE.
5. Adhere pompoms to top using Glue Dots Mini Roll.
6. You can adhere some buttons or any embellishments you like with Glue Dots Craft Roll to finish your trees.
7. Enjoy!

Supply List:
Echo Park Holly Jolly Christmas papers
Twine
Buttons or any embellishments

......

Thanks for letting me share my projects with you using my:


Have a wonderful and safe Holiday week! Happy Thanksgiving!


Images and Designs © 2011 Jenny Suchin Designs

Thursday, October 20, 2011

Glue Dots Fun Fall Projects!!!

HI EVERYONE!! Happy Friday-eve! Hope you're having a great week.

This is my first post and projects as a Glue Dot's Dottess!!!
Im so excited! So glad I can share my projects with you!!!


My first project is a fall picture frame ... came out quite nicely! It was so much fun to make!
What do you think?


To piece everything onto the frame, I used lots of Glue DotsGlue Dots come in arrays of sizes and shapes and they stick SO well!! On this project I use Mini Glue Dots, Craft Glue Dots, Ultra Thin, Glue Lines and Pop Up Glue Dots.  For the images I used some stamps designed by Me for The Craft's Meow and some twine from The Twinery! :)

To make the frame, here are the instructions and the supplies below that:

1. Use some stamps and stamp them on cardstock using memento ink.
2. Fussy cut them out and paper piece them together (if needed)
3. Use your glue dots and place them how you want them on your frame.
4. Draw your swirly lines around your frame, use some Glue Dot Lines and follow your line around with the glue. Then add your twine.
5. Add a picture and enjoy it each fall!!


Supplies:
1- Ikea Picture Frame
Glue Dots Lines, Pop Up, Ultra Thin, Craft and Mini
Stamps of your choice
Colored Cardstock
Scissors
Twine
Memento Ink - Black

Next I did a sweet little card for fall!


I paper pieced (one of my favorite techniques) this fun owlkey! :) For him I used some Glue Dots Craft and Pop Ups to paper piece the cardstock onto the card. 

Supplies:
Glue Dots Craft and Pop Ups
Cardstock
Memento Ink

Thanks for stopping by and letting me share my first project for Glue Dots with you!!
Have a great day!!


Jenny Suchin

Tuesday, September 6, 2011

2011-2012 Glue Dots Design Team - Im a Dottess!!


HI EVERYONE! Just wanted to share some exciting news!!

I made the Glue Dots Design Team!!
IM A DOTTESS!!!
So excited to share the news!!

Check out the announcement HERE!

Thanks for droppin' in!! 
:) :) :) Jenny