Showing posts with label Tutorials. Show all posts

Wednesday, April 6, 2011

Watercoloring with Distress Inks - Part 2

Hi everyone!! Hope your week is going great!
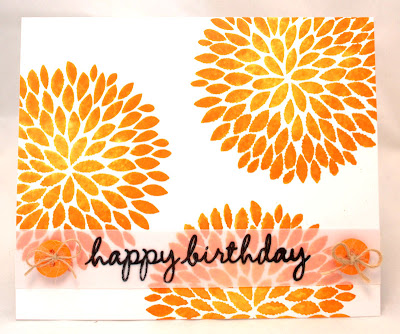
I got allot of requests about a tutorial for this card:


On this card I used the beautiful Large Flower Pattern stamp from Hero Arts! Its a gorgeous stamp and a must have! There are so many creations you can make using this stamp and since so many of you requested to know how I did this card I want to share with you today another video tutorial. This is my second video, im starting to get the hang of it. If anyone knows any good video editing software, please let me know. The one that came with my Flip isn't the best. Just email me at weememoriesblog@gmail.com, thanks!

So in the beginning, I show what you need to make this but I will list it here as well:
Large Flower Pattern stamp from Hero Arts
Papertrey Ink White cardstock
Watercolor Paintbrush
Tim Holtz Distress Inks
Mini Mister from Ranger
Large Acrylic Block
Baby wipes

Other supplies used to create the finished card:
Burlap Twine
Papertrey Ink Kraft cardstock
Old Letter Writing stamp from Hero Arts
Thinking of You messages from Hero Arts
Antique Engravings from Hero Arts


Hope I explained everything so you can understand how I did this. It's very easy and fun! Please let me know if you create one like this, I would love to see!!


Thanks for watching!! Have a great day!
:) :) :) Jenny


P.S.: I will be back later with your Color Cubbie Winner and I will be having a HUGE giveaway and another video tutorial using the Lifestyle Crafts Letterpress!!

Tuesday, April 5, 2011

Watercolor Card Video Tutorial :)

Hi everyone!! :)  Hope your week has started off great.
I was at the doctor most of the day. Spent most of the time waiting. Don't feel so good but I hope it passes. Having some tests done and seeing a specialist to get a check up on my heart. I have a minor heart condition but lately its been acting up so I needed to have some testing done to make sure everythings ok. And I have to carry a monitor with me for a couple weeks. Im praying all is well and that it may be just stress or something.

Anyhoo ... I have gotten a few requests for a tutorial on my watercolor cards I did HERE, and since my husband has been fussing at me to use my FLIP I got for Christmas I thought I would do my first ever video!!

So without further ado, here is my first video (Im a little nervous ;) I hate my voice so thats why I never do any videos but my hubby wants me to use his gift LOL so please excuse my horrible voice!

In my video I am using the Large Solid Flower stamp from Hero Arts and Tim Holtz Distress Inks!


And here are the cards I created with this technique:


This one I made using the colors I showed in the video.


This card I did for last months Hero Arts contest - Birthday's and Envelopes!

ps: I will be back with a winner for the Color Cubbie giveaway!!

Thanks for watching! :) :) :)

Tuesday, May 18, 2010

Fabric Flower Tutorial


Morning all! :) Most of you dont know this but I used to make fabric headbands before I really got into papercrafting. I still make them but only for my little girl or friends. I finally found the cutest little fabric store in town YAY! Did ya know it they been around for 20+ years! ACK! And here I thought all we had was Joanns! Oh what ive been missing. And they have the cutest lil name 'Strawberry Patches'... LOVE IT! WONDERFUL selection of fabric and other necessities ... they even have Cosmo Cricket, My Minds Eye and more great fabrics from paper companies. Im so excited! Can ya tell? Isnt it the cutest little store? Sorry for the not so great pic it was taken with my Iphone.


Anywhoo... so I thought it would be fun to share (and get my tutorial count up lol) on how I make my little fabric flowers. I know everyones seen these everywhere but theres not always a tutorial around. If there is, well, im adding my 2 cents... (hehehe). 


So lets get started, shall we...


My list of ingredients:
Fabric - any kind
Thread - whatever matches your fabric or clear
Needle, Scissors, Buttons, Spellbinders or Circle Templete

If you cant see the pictures that well, just click on them for a larger size.

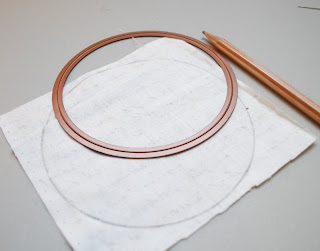
Cut a 4" circle using your Spellbinders Large Circles as a template or freehand your circle.

When your done cutting it should look all pretty as a circle like this.

Get your needle and thread. I like to use the thread doubled up. Works best for this project.

Turn the fabric over, pattern facing down. Thread in and out on the edge of the circle all the way around holding your pleats while you weave in and out. Make sure you go in and out as big as you want your pleats to be.

Once you have gotten a good start it should look like this if you let go.

If you pull the thread it should bunch up like this.

Once you have made it all the way around the circle you should have two ends of thread. Gather the fabric together by pulling both ends tightly. Once it looks like the picture above, I like to take both ends of the thread and tie a knot twice to keep my flower in place. Heres where you can also play around with it so you get the pleats how you want them to look.

Now go to your button stash (mines PTI) and pick a button that you want to use for your flower. Here I have used PTI Dark Chocolate.

Thread your needle through the bottom of your button and over the top. I normally like to use a 4 hole button but this button matched perfectly so I used it. If your using this flower for papercrafts or any other projects that doesnt need the back to show, just thread your needle up and down through the back. I like to do it at least 3 times to get a good hold.

Passing through the back.

On your last pass through the back and up, dont go through the button. Come out the side of the fabric middle and we are going to make our knot to hold our button in place.

Bring your needle through under the button to hide the thread (if your using colored thread). Then take your needle and pass back through again leaving a loop. Put your needle through the loop and pull to make a knot.

Cut the remaining thread close under the button so it doesnt show.

And TADA... you have your cute little fabric flower button!!! YAY! :)

You can make them in any fabric color or patterns. I love the beautiful variety of fabrics out there! :)

I hope you have enjoyed my little tutorial... I hope it will help someone out there. Im sure theres tons of tutorials on these but I had fun doing my own.

ps: Does anyone know how to stop blogger from doing double line breaks? im tired of it!! very frustrating lol

Thanks for peeking!! Blessings to you all!!! -xo